前言
通常,我们可以将博客部署到github,但是如果您觉得加载太慢,则可以选择将其部署到您自己的服务器上。
如果你还没有博客,要构建自己博客,请参阅 build blog
以阿里云服务器为例
首先购买阿里云服务器,请参考detail
登录到阿里云服务器 putty
使用超级用户登录后,创建普通用户。
adduser xxxx将普通用户添加到sudo组
chmod 640 /etc/sudoers
vim /etc/sudoers
将以下语句添加到 /etc/sudoers
xxxx ALL=(ALL:ALL) ALL如果发生此错误,请以普通用户身份登录: error: sudo: unable to resolve xxxx
步骤 1:
vim /etc/hostname将以下语句添加到 /etc/hostname
xxxx步骤 2:
vim /etc/hosts将以下语句添加到 to /etc/hosts
127.0.0.1 localhost xxxx接下来:
sudo apt-get install giterror: Unable to locate package git
解决方法:
sudo apt-get update再增加一个git用户
adduser git
su git
cd /home/git/
mkdir -p sources/blog
mkdir repos && cd repos
git init --bare blog.git
cd blog.git/hooks
将以下语句添加到 blog.git/hooks
git --work-tree=/home/git/sources/blog --git-dir=/home/git/repos/blog.git checkout -f接下来:
chmod +x post-receive测试git仓库
PC客户端也就是:
ssh-keygen
vim id_rsa.pub
复制里面的内容
阿里云服务器:
sudo vim /home/git/.ssh/authorized_keys粘贴上个步骤复制的内容
git clone git@server_ip:/home/git/repos/blog.git创建一个nginx服务器
cd /usr/local/src
wget http://nginx.org/download/nginx-1.15.2.tar.gz
tar xzvf nginx-1.15.2.tar.gz
cd nginx-1.15.2
./configure
make && make install
alias nginx='/usr/local/nginx/sbin/nginx'
编辑这个文件/usr/local/nginx/conf/nginx.conf
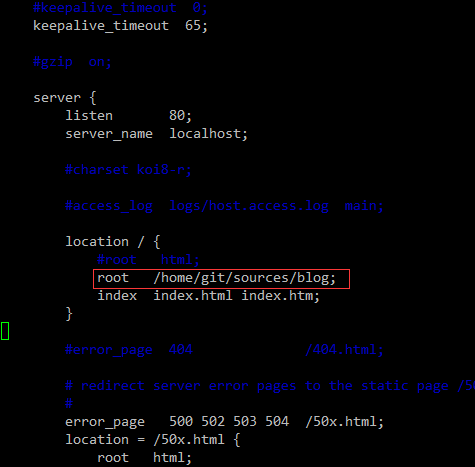
开机自启nginx
sudo vim /etc/init.d/nginx.sh将以下语句添加到 t/etc/init.d/nginx.sh
1 | #auto run nginx when system startup |
sudo update-rc.d nginx.sh defaults11. 配置文件 _config.yml
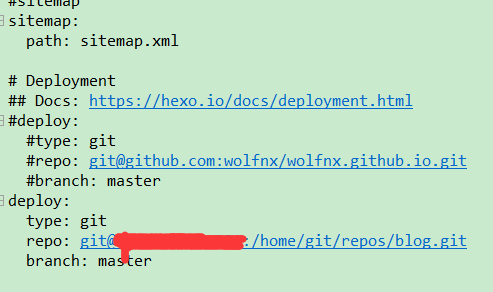
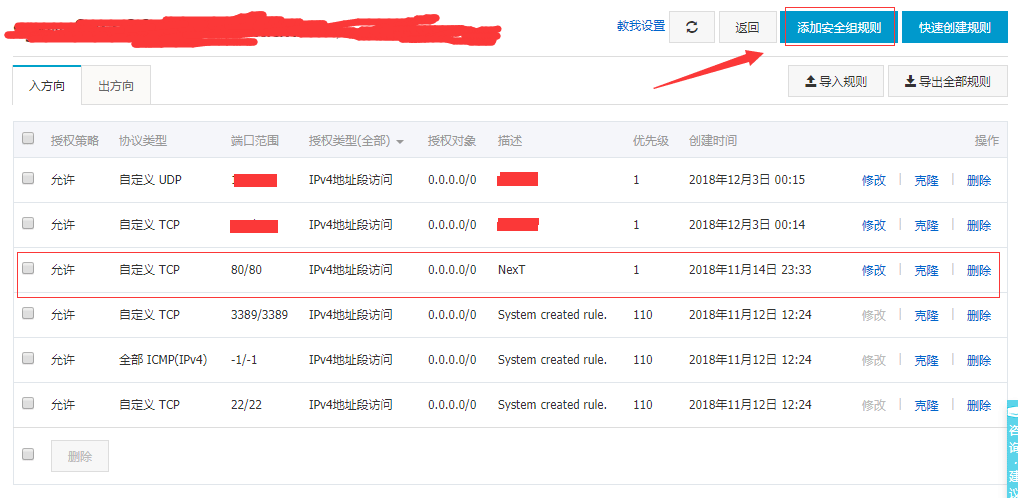
12. 将博客部署到服务器
hexo clean && hexo g -d13. 您必须在阿里云上添加安全组,否则端口80不可用
转载请注明出处:http://www.wolfnx.com/2018/03/16/HexoDeployOnAliyun
作者 : wolfnx
邮箱 : wolfnx@outlook.com
邮箱2 : lostnx@gmail.com