前言:
我们要调试驱动模块,但整个编译kernel太麻烦,这个时候就需要单独编译,下面就介绍一下详细的编译过程。
编译环境:
首先需要一个编译过的kernel源码,当然使用ubuntu系统/usr/src/linux-headers-x.xx.x-xx-generic下的kernel源码也可以。
区别:
- 使用编译过的kernel源码来编译,那么编译后生成的.ko文件,和之前编译kernel时的架构一样。
- 使用ubuntu系统下kernel源码编译,生成的.ko文件,是x86-64架构,只能在x86体系架构上使用。
测试源文件:
test.c
#include <linux/init.h>
#include <linux/module.h>

MODULE_LICENSE("Dual BSD/GPL");
MODULE_AUTHOR("lost");

static int __init test_init(void)
{
    printk(KERN_DEBUG "test init.\n");
    return 0;
}

static void __exit test_exit(void)
{
    printk(KERN_DEBUG "test init.\n");
}

module_init(test_init);
module_exit(test_exit);
Makefile文件:
Makefile
#Deisgn by wolfnx

Q       := @
COBJS  += test.o

ifeq ($(KERNELRELEASE), )

#使用自定义路径下的kernel编译
#KERNELDIR ?=/home/lost/lost/source/kernel
#使用系统路径的kernel源码编译,根据自己系统路径修改
KERNELDIR ?=/usr/src/linux-headers-4.15.0-62-generic

PWD :=$(shell pwd)

modules:
    $(MAKE) -C $(KERNELDIR) M=$(PWD) modules

modules_install:
    $(MAKE) -C $(KERNELDIR) M=$(PWD) modules_install

clean:
    $(Q)rm -f  *.ko   *.o   *.mod.c   modules.order   Module.symvers

.PHONY:modules modules_install clean

else
    obj-m :=$(COBJS)
endif
验证过程:
使用系统路径编译及验证:
make  //编译
file test.ko //查看编译后的文件可执行架构(只能在同种架构挂载)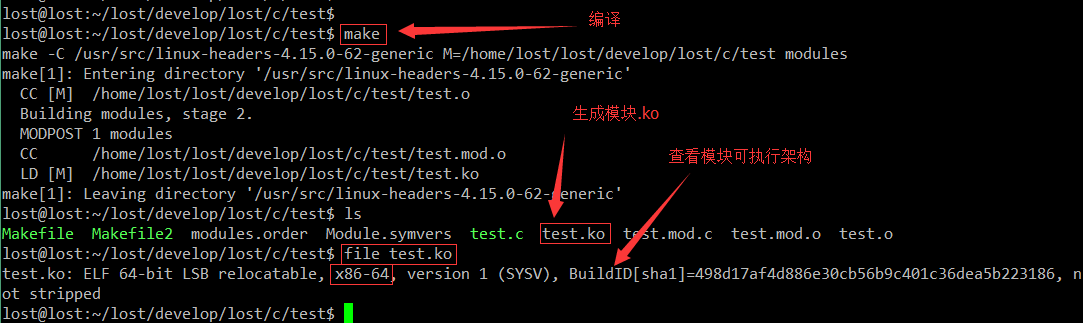
sudo insmod test.ko  //挂载
sudo rmmod test.ko  //卸载
使用自定义kernel编译及验证(在Android开发板中验证)
make  //编译
file test.ko //查看编译后的文件可执行架构(只能在同种架构挂载)
insmod test.ko  //挂载
rmmod test.ko  //卸载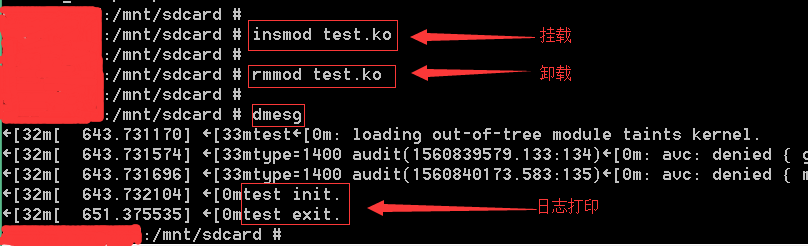
转载请注明出处:http://www.wolfnx.com/2018/11/11/CompilingKernelModule
作者 : wolfnx
邮箱 : wolfnx@outlook.com
邮箱2 : lostnx@gmail.com